
The iPhone camera is a marvel of technology, allowing us to capture life’s moments with incredible detail and clarity. But sometimes, you need to be in the picture, not just behind it. That’s where the iPhone’s built-in timer comes in handy. Whether you’re taking a group photo, a selfie with a stunning backdrop, or simply want to ensure a steady shot, the timer is your secret weapon.
This comprehensive guide will walk you through the simple steps of setting the timer on your iPhone camera, explore its hidden features, and offer creative tips to elevate your photography game.
Setting the Timer: A Step-by-Step Guide
- Open the Camera App:
Locate and tap the camera icon on your iPhone’s home screen.
- Choose Your Mode: While the timer works in both Photo and Portrait mode, select the one that best suits your needs.
- Access the Timer:
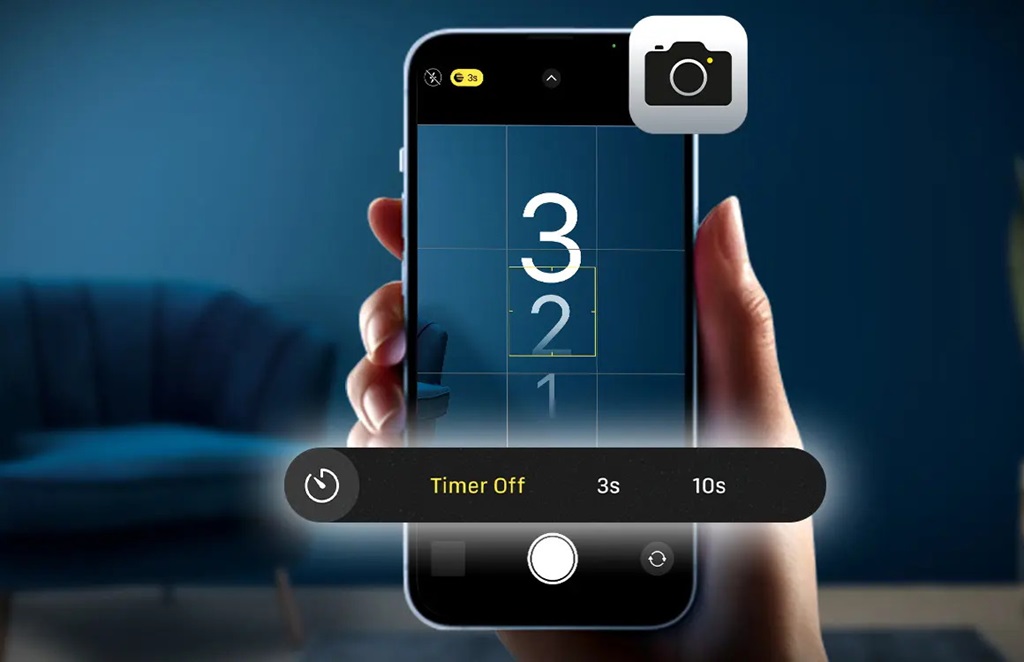
- Method 1: Tap the upward-facing arrow at the top center of the screen. This reveals a hidden menu with various camera settings.
- Method 2: Swipe up on the mode menu located directly beneath the image preview. This also opens the settings menu.
- Select the Timer Icon: Look for the icon resembling a clock or stopwatch. Tap it to activate the timer.
- Choose Your Delay: You’ll be presented with two options:
- 3s: This option initiates a 3-second countdown before the photo is taken.
- 10s: This option provides a longer 10-second delay, giving you ample time to prepare.
- Frame Your Shot: Compose your photograph, ensuring everyone is in position and the desired elements are within the frame.
- Start the Countdown: Tap the white shutter button to initiate the timer. Your iPhone will display a countdown on the screen, and a series of flashes will indicate the impending capture.
- Strike a Pose! Use the countdown time to get into position, adjust your hair, or perfect your smile.
Beyond the Basics: Unveiling Hidden Features
While the basic timer functionality is straightforward, there are a few hidden gems that can enhance your experience:
- Burst Mode: When the timer is activated in Photo mode, your iPhone automatically captures a burst of ten photos. This increases your chances of getting the perfect shot, especially when capturing action or fleeting moments. To learn more about maximizing your photography skills, be sure to explore ideya blog for tips and techniques that can help enhance your shots even further.
- Live Photos: If Live Photos is enabled, the timer will capture a 3-second Live Photo, adding a touch of animation and sound to your memories.
- Accessibility Shortcut: For users with accessibility needs, the timer can be activated using voice commands through Siri. Simply say “Hey Siri, set the timer on the camera for 10 seconds.”
Creative Applications: Taking Your Photography to the Next Level
The timer isn’t just for group photos. Here are some creative ways to utilize this feature:
- Self-Portraits with Flair: Capture stunning self-portraits in unique locations or with interesting props. The timer gives you the freedom to position yourself perfectly without relying on outstretched arms.
- Steady Shots: Eliminate camera shake and capture crisp, clear images, especially in low-light conditions. The timer allows you to trigger the shutter without physically touching the phone.
- Action Shots: Capture dynamic action sequences, like jumping in the air or tossing a ball, without worrying about pressing the shutter button at the precise moment.
- Night Photography: Use the timer in conjunction with Night mode to capture stunning long-exposure shots without introducing blur from hand movements.
- Time-Lapse Photography: While the iPhone has a dedicated time-lapse mode, the timer can be used creatively to capture a series of photos at set intervals. This can be achieved by manually pressing the shutter button after each countdown, allowing for unique sequences of images. It’s similar to how long do Nest cameras last, as both techniques focus on capturing moments over time with careful planning and timing.
Related: Unleash Your iPhone’s Potential: Essential Apps for Jailbroken Devices
Troubleshooting Tips
- Timer Not Appearing: Ensure your iPhone is running the latest version of iOS. If the timer option is still missing, restart your device or reset your camera settings.
- Blurry Photos: If your photos are blurry despite using the timer, ensure adequate lighting and stabilize your iPhone on a flat surface or tripod.
- Accidental Triggering: Be mindful of the shutter button while positioning yourself. Accidental taps can prematurely trigger the countdown.
Conclusion
The iPhone camera timer is a simple yet powerful tool that can significantly enhance your photography experience. By understanding its features and exploring its creative potential, you can capture stunning images that truly capture life’s precious moments. So, the next time you want to be part of the picture, remember to set the timer and let your iPhone work its magic.